Tuesday, November 29, 2016

Princely Baby Shower Cake and Disney Princesses!

Hello there! As promised, I'd like to share a cake that I think leveled me up in Caking XP. It was definitely a challenge, but it was fun to make. I had to dust off my gumpaste skills. I don't work with it often at work, so it took some getting used to again.


I started with the booties and crown. I made those out of gumpaste quite a few days in advance. I didn't have a baby booties cutter, so I printed out a template and made it work.

Beginning stages: sole attached to front flap


Back flap added and left to dry
As far as the crown went, I hand-drew my own template and used that to cut the gumpaste out.

I thought I had photos of the next step, but I don't. Sorry! I wrapped a can of dried oats with wax paper, then wrapped the gumpaste crown around it. I added another layer of wax paper on top of that to retain the round shape (and to keep the fleur-de-lis shaped bits from flopping forward). I waited a day, then added the little embellishments onto the front of the crown.


After they were fully dried, I made a mixture of vodka and gold dust **make sure this is quality gold dust. Wilton dust did not cut it for me** The dust I used was from CK Products, and it came in a small 2 gram container.

 While everything was drying, I covered the board in fondant (clear piping gel works great) and hot glued the sparkly ribbon onto the edges.

As far as getting the quilting pattern onto the cake, I ended cup covering the cakes in fondant then trying to press the impression mats onto the surface. It worked...ish. I ended up going over the grooves with the back of a knife. The next time I do a fondant cake (which is this weekend, actually), I'll see how it works if I press the pattern in first and then cover.

I used more hand-drawn and cut out templates for the plaques that went onto the front of the cake. I used gumpaste for the letters (make sure you have a SHARP Xacto knife to clean up your letters) and painted that as well. Here is the finished product at the party with the decorations. Lovely!


I also had a Disney princess themed cake for an adorable 5-year-old that gave me her specific cake parameters: 2 Ariels, a Mulan, a Tiana, a Pocahontas, and a Tinker Bell; all with crowns except Tinker Bell.  And of course, I had to oblige!

 
The hardest part, honestly, was mixing all of the colors. Thank goodness for parchment pouches!


I have quite a few cakes this weekend. I am currently between my mother's birthday which was this past Sunday (HAPPY BIRTHDAY MOMMY!)  and my brother's birthday, which is tomorrow. Eek! Cake chaos, but I love it!

Wednesday, November 16, 2016

As Promised: Chocolate Chocolate Chocolate Cake

I've been on a bit of a break lately. As I had mentioned in my last post-- celebration season is upon me.

I would love to share the chocolate cake I made my husband for his birthday last month. We brought it to a restaurant, and one of the waiters said that it was one of the best cakes he's ever had! Right on! I'll start with the chocolate cake recipe. This was a recipe I had found on Foodess and it was magical!


The batter came out thin-- but that's what makes it fudgy and delicous!

Next, I made the buttercream from Two Sisters Crafting.

In both the cake and the buttercream, I used Hershey's Special Dark, which made the chocolate flavor much more rich.
Then I made the chocolate ganache for coating the cake pre-fondant. This recipe came from McGreevy Cakes. I used dark chocolate chips for this as well.

With all three components made (the ganache sat overnight in the refrigerator then heated up a bit in the microwave to achieve a thick peanut butter consistency), it was time to assemble!

I applied a thin layer of piping gel then covered it with black fondant marbled with a bit of blue. I used white, pink, and purple luster dusts to make elliptical patterns for galaxies.

 And of course a galaxy cake wouldn't be complete without some glitter!

He was very happy with it!


Next post: Disney princesses and a baby shower cake fit for a king!

Wednesday, November 2, 2016

October Cakes!

Holy wow! It's been a while, folks! It all started with the hurricane that unexpectedly threw us off track for a bit there.

The month of October is usually gone in a flash because it begins birthday season-- or really, a celebration season. We have our godson's birthday, my father-in-law's birthday, our wedding anniversary, my husband's birthday, my grandma-in-law's birthday, Halloween, and so much more. It's a little crazy. Luckily, there's a bit of a break between Halloween and the end of November with my mom and brother's birthdays and Thanksgiving thrown in.

So I've been running around making lots of cakes both at home and at work (because it's also baby shower and wedding season). Here are some cakes (and cupcakes) of note:

 Two dozen Marvel/ Avengers cupcakes


 Alabama football theme cake:

Deer themed baby shower

Rum barrel cake with rum flavored cake and buttercream (with some real rum as well)
My next entry will highlight the best cake I've ever made my hubs. There's chocolate, chocolate, and more chocolate! Yum!

Wednesday, September 28, 2016

Beachy Birthday Cakes!

Happy Fall, y'all! It seems like the closer to fall we get, the more beach themed cakes seem to pop up. However, it never really goes away here in Virginia Beach. This past weekend, I had the honor of making an 80th birthday cake for my dear friend's grandmother.


The design was based off of a wedding cake I had made this past summer:

It was a hit with the party! :)

Still in ocean mode, I switched gears for my godson, Sullivan's, first birthday cake. His mother, my bestest friend, wanted a pirate octopus holding an ice cream cone in the ocean. Well, alright!

I started with 10" Funfetti cake (uh, yum!) and iced it in loose rosettes. They were made with mixes of dark blue, teal green, sky blue, and white with a cupcake tip. Instead of making orderly "O" motions, they were more like "C" and "S" motions with the bag. It turned out really cool and ocean-y (totes a word). While that chilled in the fridge, I got to work on the octopus:


Rice cereal treats to the rescue! I pulsed the cereal in a food processor before adding it to the melted marshmallows and butter to make it smoother and easier to work with. I made the tentacles that were sticking up (and holding the ice cream cone) out of the treats as well as the head. The other tentacles that were resting were made of straight fondant. I could have also made them out of gumpaste if I had started working on them days ago so they could dry up and harden. But alas, I am a procrasticaker.


Next up: Assembly! I dug out some cake and icing where I put in my tentacles, and added an actual ice cream cone with a scoop of chilled buttercream.

I added a single layer 6" cake covered in the waves for a smash cake!


The birthday boy was quite happy with his smash cake-- and yes, he was blue-- but what first birthday would it be without a blue baby?! Happy first birthday, Sully! Love, your godmother.

Wednesday, September 21, 2016

Ice Cream Theme Cake with Strawberry Filling


Hello, all!

I've been on a bit of a hiatus. I had outpatient surgery two weeks ago, and I'm just now getting back into the groove of things. All is well, though!

This past weekend, I made an ice cream- themed cake for an adorable little three-year-old. It started with baking four 6" layers of good old-fashioned Funfetti cake. Then, I went to one of my local cake supply shops for some shortcut strawberry filling-- and there wasn't any! *gasp!* I regrouped (aka got on Pinterest) and found a simple strawberry filling recipe from Food.com (thank you, Danielle Michalski!)

One thing I changed was to mash the strawberries with a potato masher. You can definitely leave it more chunky, but I wanted it to not be as overwhelming in a 6" cake.

It worked great! The consistency was perfect for stability and it tasted much more authentic than the strawberry filling sleeves at the cake supply store. And it was much more economical! I think I am forever converted.

To construct the extra tall cake layers, I treated it as a stacked cake. I placed four dowel rods into the bottom two layers (that were filled with the strawberry filling), and placed a 6" board on top of that. then I added the other two filled layers of cake. After a good crumb coat, and a long chill session in the freezer, it was ready for the final coat of buttercream and some pastel sprinkles!

Add some candy coating for the "drip effect," an actual scoop of chilled pink buttercream, a sugar cone, and voila! An ice cream cone cake fit for a dessert themed birthday party!

This upcoming weekend, I have a beach-themed birthday cake and my godson's first birthday party! Octopus pirates, here I come!

Thursday, September 1, 2016

Farm Theme First Birthday Cake and Pokemon Lego!

Ahhh September. The beginning of my favorite season! I'm so excited to bake all things pumpkin mwahahahaha! Ok, some things pumpkin... 

But I do have something close-- carrot cake! I haven't made a carrot cake in ages, so I went digging through different sources and came across a recipe at Homemade by Holman. It was adapted from Ina Garten, so it had to me good, right?

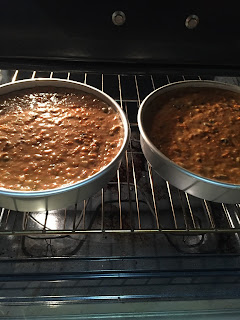
I must say, in order to make a 10" carrot cake, I had to double the recipe. Let's just say I learned that my mixer's bowl has a certain capacity-- and a 10" carrot cake was not it! Anyhoo, after mixing the batter, it was off into the oven for a total of about an hour (ovens vary, so I would recommend keeping an eye out after 55 minutes).

The carrot cake was to be farm produce themed while the other cake (vanilla with strawberry filling) was to be farm animal themed. After icing this in my go-to cream cheese icing recipe by Martha Stewart (found here), I decorated with sunflowers, carrots, and little leafy greens.


This is the animal themed cake:


There even was a little single layer 6" smash cake for the birthday girl:


The cakes were a hit, and they survived a party at a local barn in nearly 90-degree weather!
Another cake I had this past weekend was a combo Lego and Pokemon theme. the best route to go was to top each Lego stud (I had to look up the proper terminology for that) with a Pokeball. The Lego brick was a half sheet cake cut in half lengthwise and stacked on itself. The studs are discs of fondant.


The birthday boy was very excited! It was "the best cake he's ever had"! Aww shucks!